
How to Automatically Generate Subtitles in Final Cut Pro (2026 Guide)
Final Cut Pro can automatically generate subtitles from spoken audio on supported Apple silicon Macs. Its built-in transcription supports U.S. English; for Japanese, Chinese, Korean, Spanish, or other languages, you can generate subtitles with Taption and import them into your edit. Here is how to add subtitles in Final Cut Pro, review their timing, and export the right format.
Quick answer: Final Cut Pro auto subtitles in three steps
- 1. Generate: Select dialogue clips in the timeline. In newer versions, choose
Edit > Generate Captions > Subtitles. In FCP 11, chooseEdit > Captions > Transcribe to Captionsfor closed captions. - 2. Review: Correct names, punctuation, and timing. For non-English audio or translation, generate subtitles in Taption, then import SRT or FCPXML.
- 3. Deliver: Use titles for visible, styled text in the video, or export a caption file when viewers need switchable subtitles.

Can Final Cut Pro Automatically Generate Subtitles?
Yes, but the output depends on your version. FCP 11 introduced Transcribe to Captions, which produces iTT closed captions. Apple added the newer subtitle-generation workflow in FCP 12.3, according to its release notes. The current 12.4 guide distinguishes editable subtitle titles from closed captions.
Automatic speech recognition requires Apple silicon and supports U.S. English. FCP 11 transcription requires macOS Sequoia or later; check the system requirements for your installed release before updating. Transcription runs on-device, with an initial language-model download. Processing time depends on the material and your Mac.
- English dialogue: Start with native transcription; choose titles for visual styling or closed captions for caption-file delivery.
- Other languages or translation: Use Taption and import SRT or FCPXML.
- Multilingual editable titles: Choose Taption’s FCPXML Titles export. For a straightforward caption track, SRT is usually simpler.
Method 1 — Generate Subtitles Using Final Cut Pro’s Built-In Tools
FCP 12.3 and later: Generate Captions
- 1. Select your dialogue: Open the project and select the timeline clips that contain speech.
- 2. Generate subtitles: Choose
Edit > Generate Captions > Subtitles(Shift-Command-S). Allow the initial language-model download to finish. Subtitle title clips appear above your video. - 3. Review the result: Play through the dialogue, correct the text, and adjust clip boundaries where necessary. Check names and punctuation before styling.
These steps follow Apple’s automatic subtitle guide. Select a generated title to edit its text in the Text inspector.
For closed-caption output, choose Edit > Generate Captions > Closed Captions (Shift-Command-C). The result is iTT caption clips in a caption lane, as described in Apple’s closed-caption instructions. Choose this route when you need a caption file for delivery.
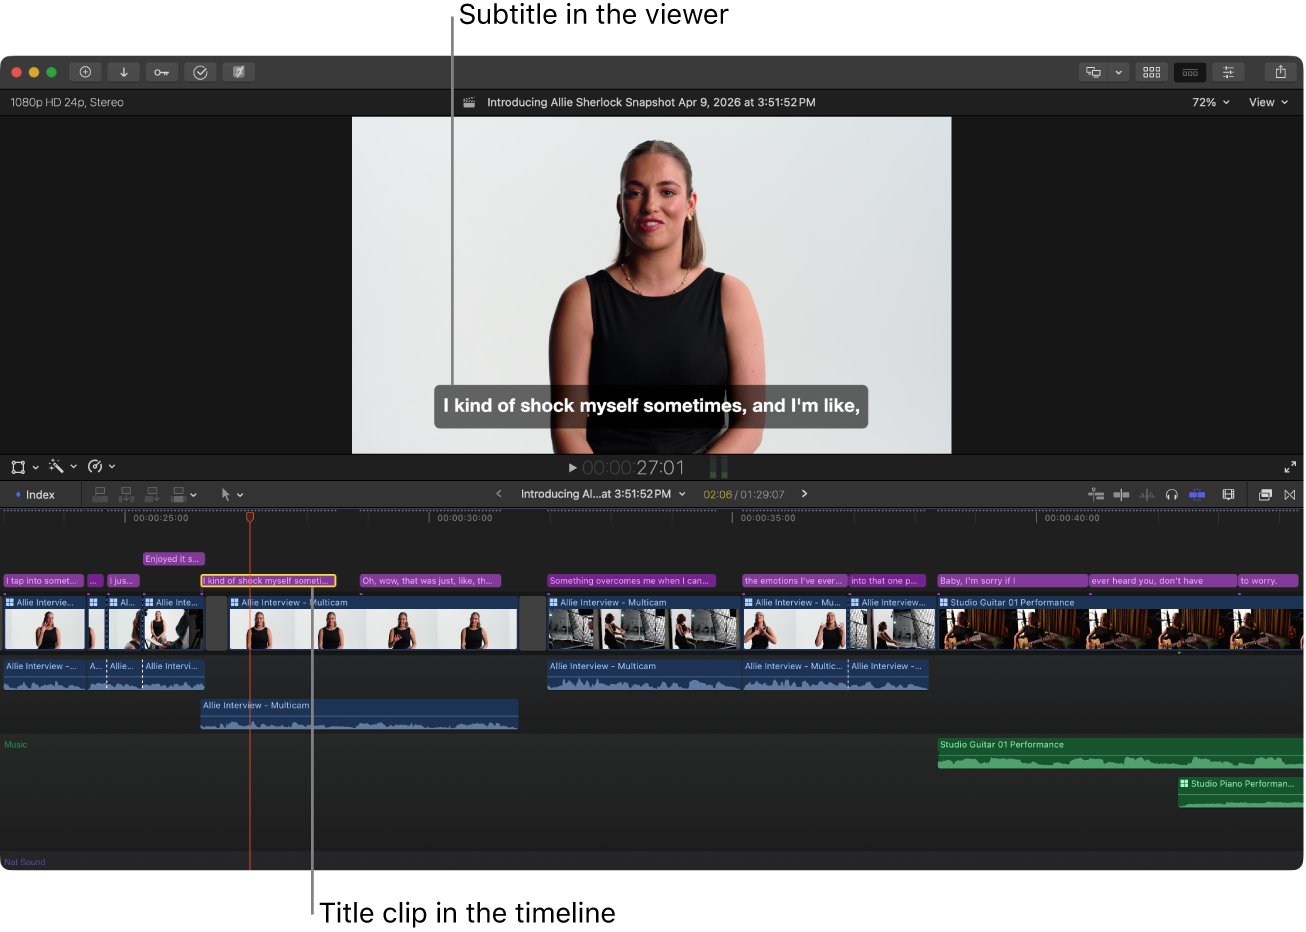
Source: Apple’s Final Cut Pro 12.4 guide. This documentation screenshot shows native subtitle titles, not a Taption import.
FCP 11: Transcribe to Captions
Select one or more timeline clips, then choose Edit > Captions > Transcribe to Captions (Shift-Command-C). Double-click an iTT caption to correct its text; drag its edges to adjust its duration. This is the older caption workflow; it does not generate the newer Subtitle title clips. If your menu differs, check your version under Final Cut Pro > About Final Cut Pro.
Method 2 — Generate Multilingual Subtitles with Taption
For non-English dialogue, use Taption’s AI subtitle generator before returning to Final Cut Pro. Work from the same cut you plan to finish: transcribing an earlier edit creates avoidable timing work after import.
- 1. Upload your reference: Export the edited video or an audio reference that preserves the full timeline duration, including pauses. Upload it to Taption.
- 2. Choose the spoken language: Select the language heard in the recording and run transcription. Choose your subtitle language based on the audio, not the language you eventually want viewers to read.
- 3. Review before translating: Correct names, technical terms, line breaks, and sentence timing in Taption’s editor. A cleaner source transcript makes translated subtitles easier to review.
- 4. Translate if needed: Add a target language, then check meaning and reading speed. Keep original-language and translated versions clearly identified.
- 5. Export: Download SRT for standard captions, or Final Cut Pro XML for editable titles or captions. For FCPXML, choose the frame rate and resolution that match your project.
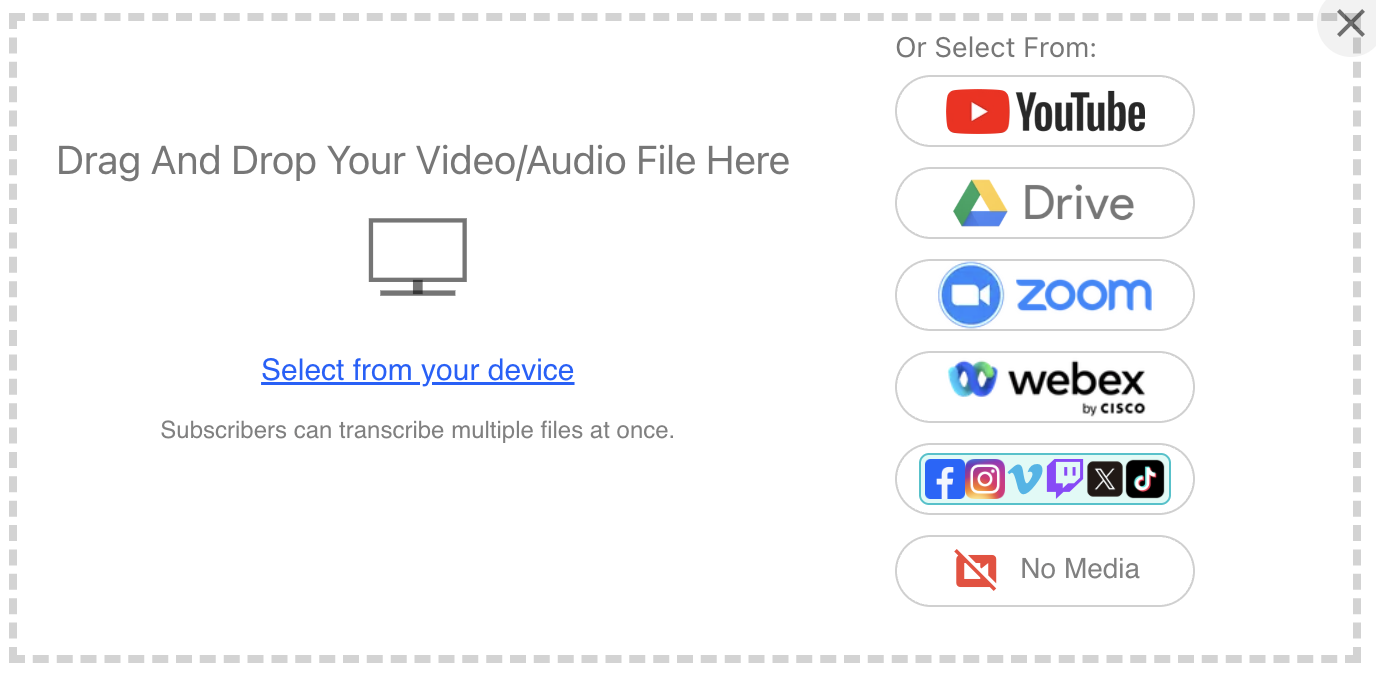
Select your video or audio file in Taption’s upload area. In the following transcription settings, choose the language spoken in your recording.
For two languages on screen, see how to create bilingual subtitles. Decide whether viewers need both languages visible together or separate selectable tracks before choosing the export layout.
How to Import SRT or FCPXML Subtitles into Final Cut Pro
Import SRT for a standard caption track
Open the destination project and choose File > Import > Captions, labeled Closed Captions in newer versions. Select the .srt file, assign its caption role and language, then choose the insertion-time option. Apple explains these settings in its caption import guide.
Use Relative to Timeline when subtitle timestamps start from the beginning of your full-project reference. Use Absolute when timestamps already match the project’s timecode. For example, with a project starting at 01:00:00:00, Relative to Timeline places an SRT cue at 00:00:05,000 five seconds into that project. A reference exported from only part of the edit needs an additional offset. Click Import and check the first, middle, and final lines against the dialogue.
Import FCPXML for titles or captions
In Taption’s export dialog, select Final Cut Pro XML, then choose Titles for editable text clips or Captions for a caption workflow. Set the project’s frame rate and resolution explicitly: 23.98 and 24 fps are different choices. Review bilingual and speaker-name options before downloading.
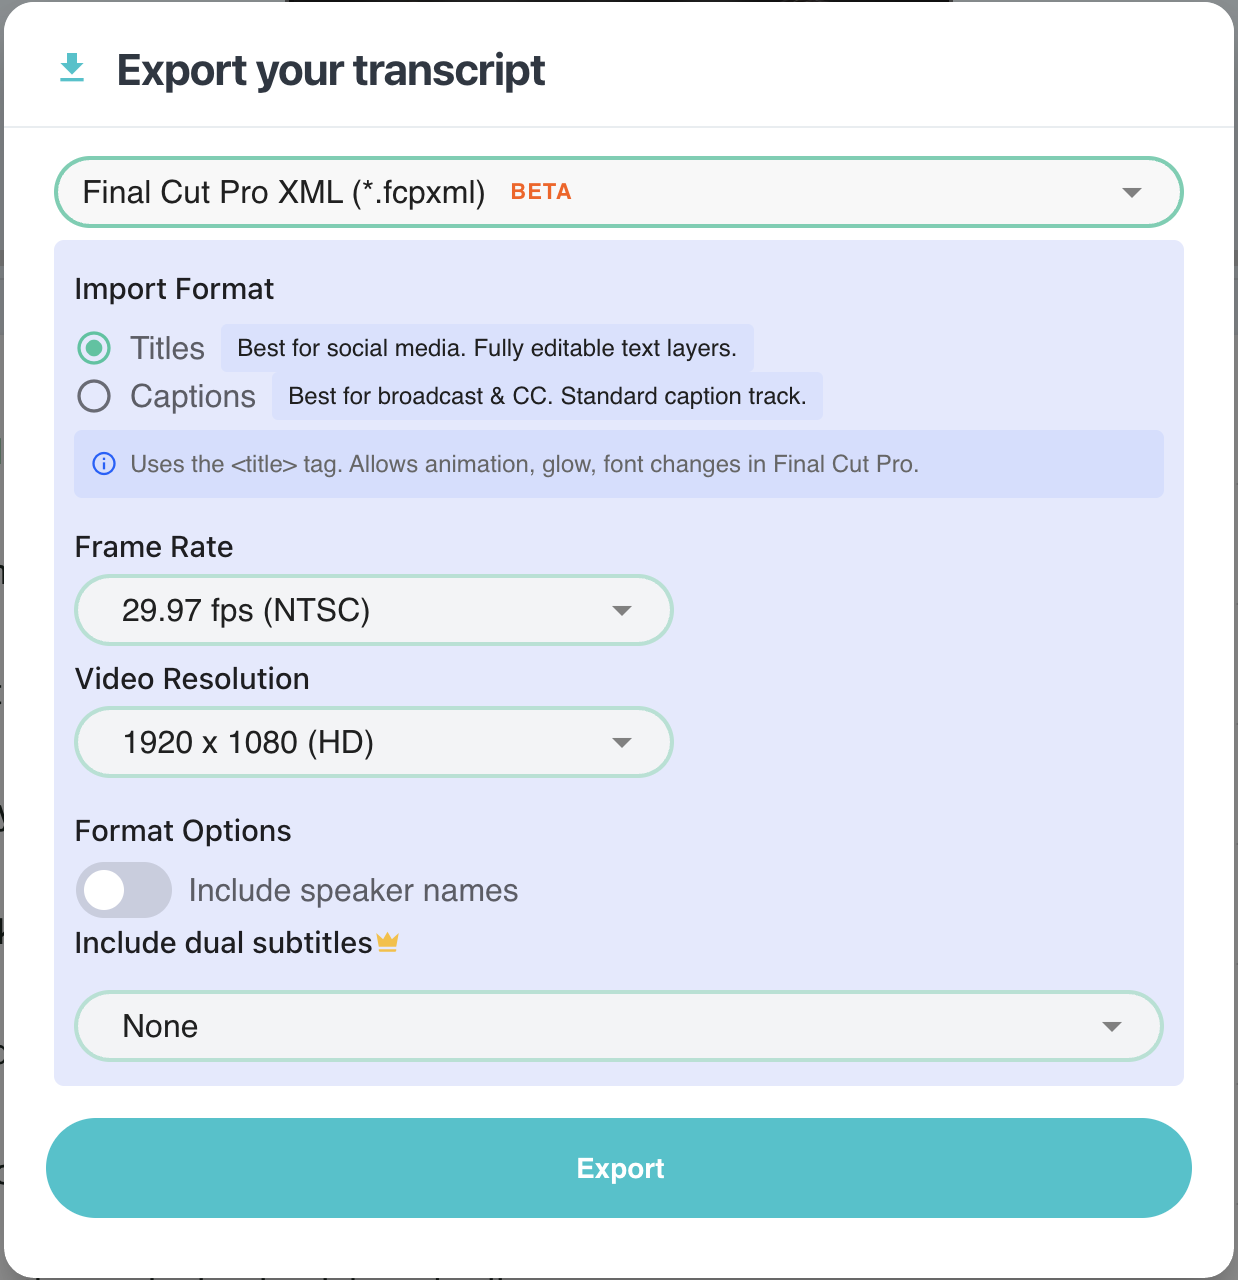
Taption’s Final Cut Pro XML export settings in English. Choose Titles or Captions and match your project’s frame rate and resolution; the pictured 29.97 fps and 1920 × 1080 settings are examples.
In Final Cut Pro, choose File > Import > XML and select the downloaded file. Open the imported project and check the timed text against your reference. If moving the subtitle clips into your main edit, preserve their relative positions and starting offset. See Taption’s Final Cut Pro XML export guide for the export options.
After import, confirm that Titles appear as editable text clips or Captions appear in a caption lane. For bilingual output, check both languages in the viewer, including character display and line breaks. FCPXML places timed elements; it does not guarantee alignment after you cut, retime, or rearrange footage. Recheck synchronization after substantial changes.
How to Create Styled and Animated Subtitles
Editable titles are the practical choice for branded fonts, positioning, and animation. For native Subtitle titles, select a title, open the inspector with Command-4, and use the Title inspector’s Animation Style controls. Use the Text inspector for font, size, and color. Taption FCPXML Titles can use suitable title controls or compatible Motion templates; available controls depend on the template. Test one subtitle before styling the whole project.
Newer versions also let you select existing captions and choose Edit > Closed Captions > Duplicate Captions to Subtitles. Apple documents this conversion as creating title clips while retaining the originals. This gives imported SRT captions another route to editable titles.
Keep the caption track if you need a separate file later. Closed-caption formats restrict styling and may render differently in players. For visible text, check contrast, line length, and placement on a phone-sized preview; avoid covering faces or app controls. Two languages need enough space and reading time to remain useful.
How to Export Subtitles from Final Cut Pro
- Burned into the video: Enabled title clips render with the picture. For closed captions, select the burn-in option in a supported share destination. Viewers cannot turn burned-in text off.
- Embedded captions: Final Cut Pro supports embedding CEA-608 in compatible output media. Do not assume iTT or SRT can be embedded through the same workflow.
- Separate files: Choose
File > Export Closed Captionsin newer versions, orFile > Export Captionsin older versions. Select the language subroles to export. iTT and SRT are delivered as sidecar files.
To export SRT from generated iTT captions, select the captions, Control-click, and choose Duplicate Captions to New Format > SRT. Duplicating the captions preserves the originals; review the copy for formatting changes before exporting its language subrole.
For a caption file that starts with the exported video, choose Relative to Timeline in the export dialog. Apple’s caption export guide explains the delivery settings. Title clips do not become an SRT file through this command, so retain a caption version if you need both outputs. XML export transfers project information; it does not replace caption-file export. Preview the final video and caption file in the intended player.
Troubleshooting Common Subtitle Problems
- Command missing or grayed out: Check the Final Cut Pro version, Apple silicon requirement, compatible macOS, and timeline selection. Select a clip with usable speech. Allow the first language-model download to finish.
- Wrong language or poor transcription: Built-in recognition supports U.S. English. For other languages, transcribe externally. Check the recording for music, overlapping voices, or unclear dialogue and review the text manually.
- Everything is equally early or late: Check the reference file’s start, project timecode, and Relative versus Absolute import setting. A constant offset calls for an alignment adjustment.
- Sync gets progressively worse: Check for retimed media, an older reference edit, and mismatched FCPXML frame-rate settings. SRT uses timestamps rather than a selectable frame rate, so inspect its timing instead of assuming an fps setting is the cause.
- Import errors or missing text: Use caption import for SRT and XML import for FCPXML. Check file validity, enabled roles, and available title templates. Resolve caption validation warnings before export.
Frequently Asked Questions
Does Final Cut Pro automatically generate subtitles?
Yes. Supported Apple silicon Macs can transcribe U.S. English dialogue. Newer versions offer editable subtitle titles and closed captions; FCP 11’s original command creates iTT captions.
Can Final Cut Pro generate subtitles in other languages?
Built-in automatic transcription is limited to U.S. English. Generate non-English subtitles with an external tool such as Taption, then import SRT or FCPXML.
Can I import SRT files into Final Cut Pro?
Yes. Open your project and use the caption import command. Select the language role and insertion-time setting, then check alignment against the dialogue.
How do I make animated subtitles in Final Cut Pro?
Use editable title clips with suitable animation controls or Motion templates. Newer versions can also duplicate closed captions into subtitle titles. Standard caption files have more limited styling.
Can I translate Final Cut Pro subtitles automatically?
Use a subtitle translation tool such as Taption, review the translated text, then import the resulting SRT or FCPXML. Automatic translation still needs a language and timing review.
Final Thoughts
Start with native tools for English dialogue. Choose Taption when you need multilingual transcription or translation, then use SRT for captions or FCPXML for editable title output. If you are new to the transcription step, the Taption AI subtitle tutorial walks through uploading and reviewing your first video.